Working with Zoho Flow Agent
To create workflow automation in PAM360 on-premise application via Zoho Flow, a Zoho Flow agent is required that allows creating the required workflows, which include triggers and actions of on-premises applications, allowing them to exchange data between your cloud apps as well as the other on-premises applications in a secured manner.
Follow the below steps to download and install the Zoho Flow agent in the PAM360 installed server based on your operating system.
a. Downloading the Zoho Flow Agent Installer File
- Log in to the Zoho Flow application.
- Navigate to Settings >> Agent and click CREATE AGENT.
- On the page that appears, select On-Prem Agent and click NEXT.
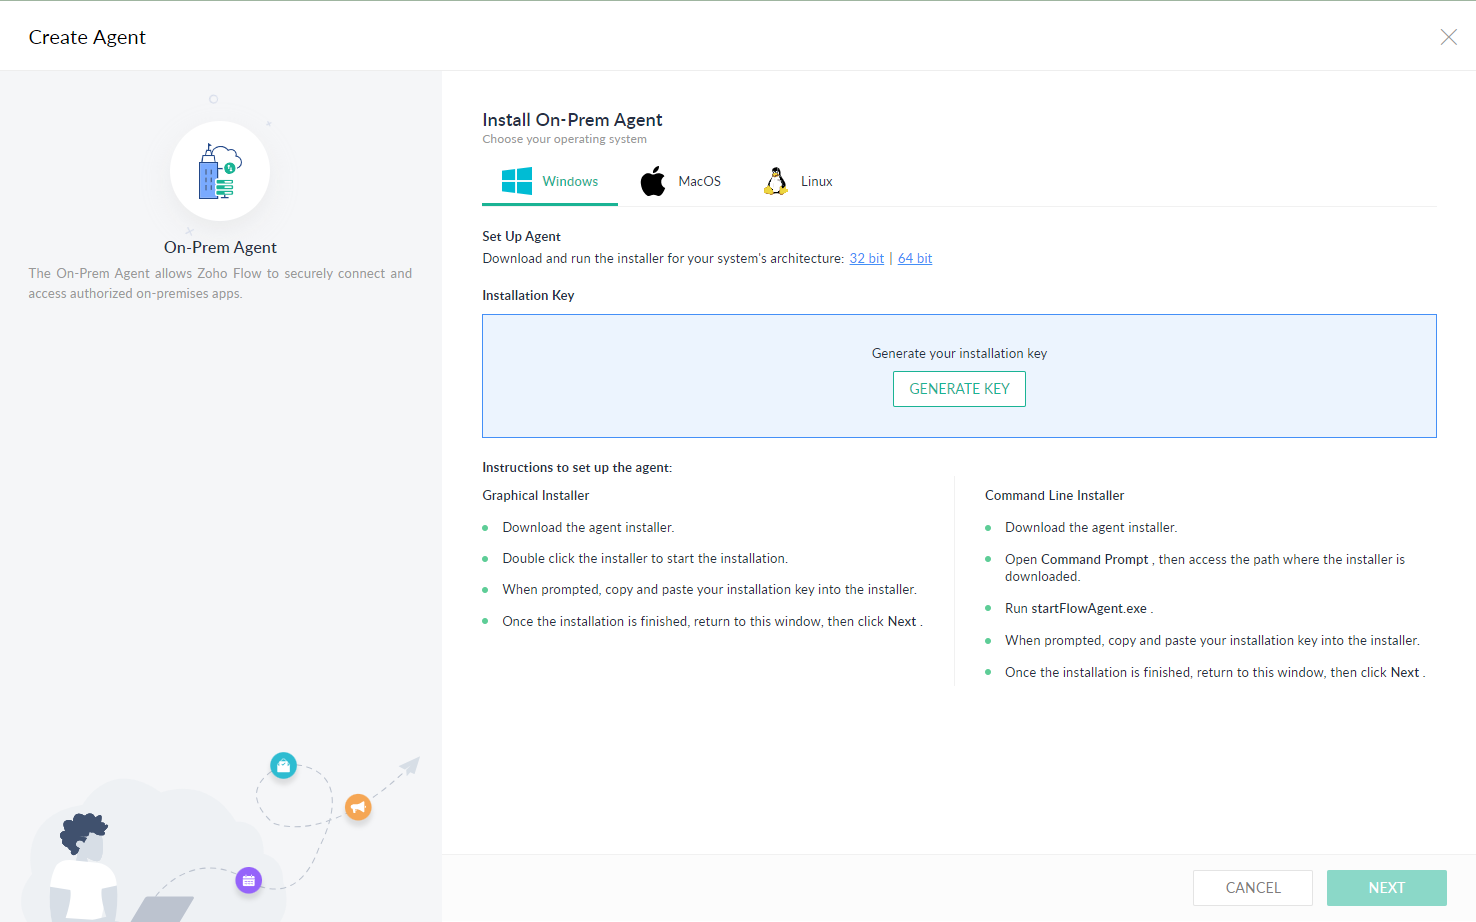
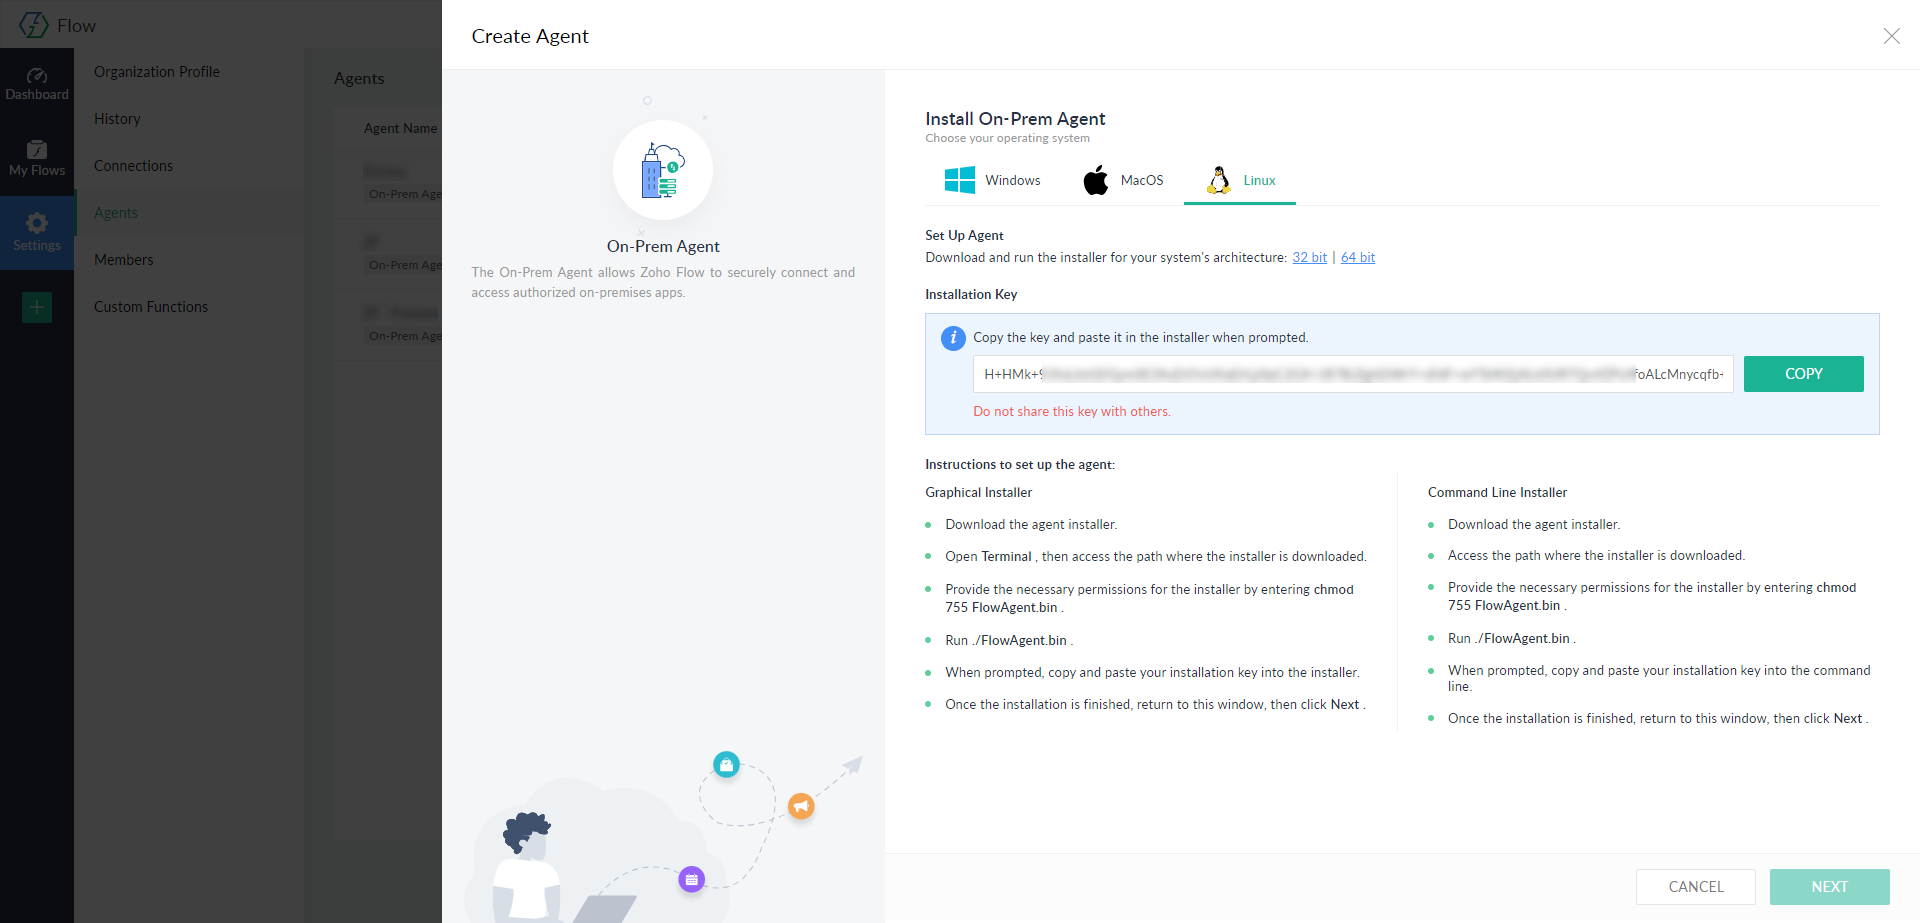
- Now, navigate to the tab Windows or Linux and download your Zoho Flow agent installer file based on your system's architecture (32-bit | 64-bit).
- Click GENERATE KEY to generate a unique key for this agent. In the window that opens, click Accept to continue.
Note: The installation key can be generated by the administrator or the organization owner only.
b. Installing the Zoho Flow Agent - In Windows
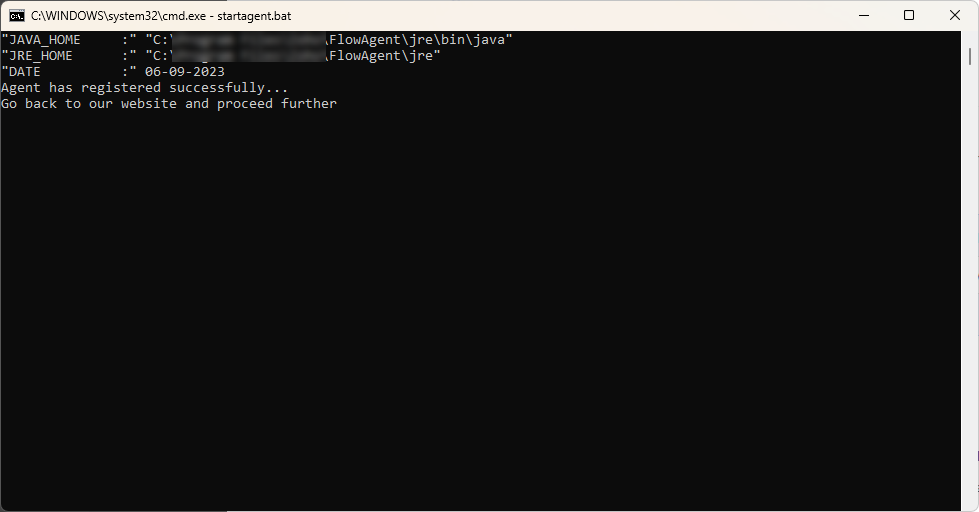
- Navigate to the agent file downloaded path and launch the FlowAgent.exe as an administrator to start with the installation.
(or)
Open the Command Prompt as an administrator, navigate to the agent file directory path, and execute the command start FlowAgent.exe. - In the Zoho Flow On-Prem Agent InstallShield Wizard that opens, click Next and agree to the terms and conditions to continue with the installation.
- In the Configuration Panel page, enter the Agent Installation Key copied from the Create Agent page from the Zoho Flow site.

- Change the destination location to the desired path where the agent installation files are to be placed.
- Configure the Proxy Details if required and click Next.
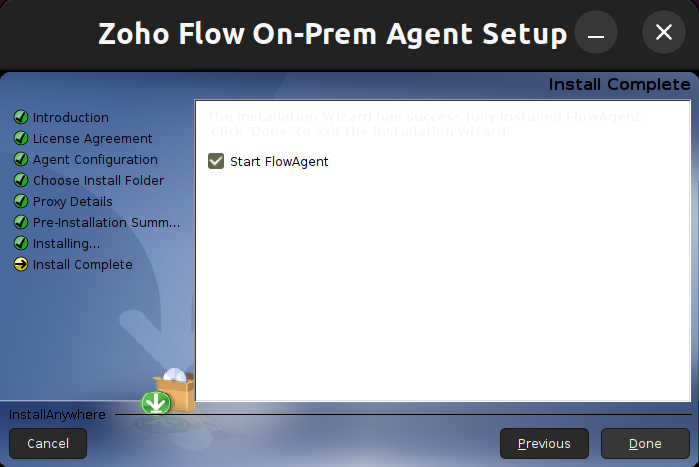
- Finally, click Install to proceed with the installation and enable the checkbox to start the Zoho Flow agent.
- Once you are done with the installation, return to the Zoho Flow Create Agent window and click Next.

c. Installing the Zoho Flow Agent - In Linux
i. Installation using Graphical Installer
- Open the terminal and navigate to the path where the Zoho Flow agent installer is downloaded.
- Provide the necessary permissions for the installer by executing the command: chmod 755 FlowAgent.bin.
- Now, execute the command -./FlowAgent.bin.
- In the InstallAnywhere dialogue that opens, click Next and agree to the terms and conditions to continue with the installation.
- In the Agent Configuration page, enter the Agent Installation Key copied from the Create Agent page from the Zoho Flow site and provide an agent name.
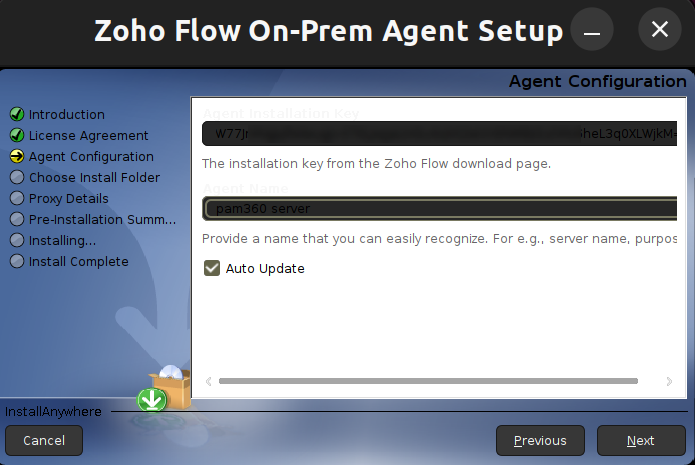
- Change the destination location to the desired path where the agent installation files are to be placed.
- Configure the Proxy Details if required and click Next.
- Finally, click Install to proceed with the installation and enable the checkbox to start the Zoho Flow agent.
- Once you are done with the installation, return to the Zoho Flow Create Agent window and click Next.
ii. Installation using Command Line Interface
- Open the terminal and navigate to the path where the Zoho Flow agent installer is downloaded.
- Grant the necessary permissions to the installer by entering the following command: chmod 755 FlowAgent.bin
- Execute the agent installer by entering the following command:./FlowAgent.bin.
- When prompted, enter the agent installation key (copied from the Create Agent page from the Zoho Flow site) and also provide a name for the agent.
- Specify the desired installation path for the agent.
- If required, configure the proxy details.
- Review the installation details, and then press enter to proceed.
- Once the installation process is complete, return to Zoho Flow and click Next.
d. Post-Agent Installation Steps
The installed agents should always be updated to ensure a continuous workflow automated between the applications. We always recommend using the auto-update for seamless operations in the automated workflows.
To manage the agent update:
- Navigate to Settings >> Agent and click VIEW DETAILS beside the respective agent.
- In the pop-up that opens, enable or disable the Auto-Update feature using the provided toggle button.
Note: By default, the agent installed will be enabled with the Auto-Update post-installation.
To delete the agent:
- Navigate to Settings >> Agent and click the delete icon beside the VIEW DETAILS button.
- You will be listed with the details of the workflow configured relevant to the agent. Ensure once and confirm the deletion process.