Configuring SAML Single Sign-On (SSO) using G Suite
SAML Single Sign-On (SSO) is an authentication method that allows users to log in to applications using a single credential. ManageEngine PAM360 offers support for SAML 2.0 and allows users to configure SAML using Okta, Microsoft Entra ID, ADFS, and G Suite/Google Workspace to use SSO.
Follow the below steps to configure SAML SSO in G Suite/Google Workspace and enable the same in PAM360.
Steps Required
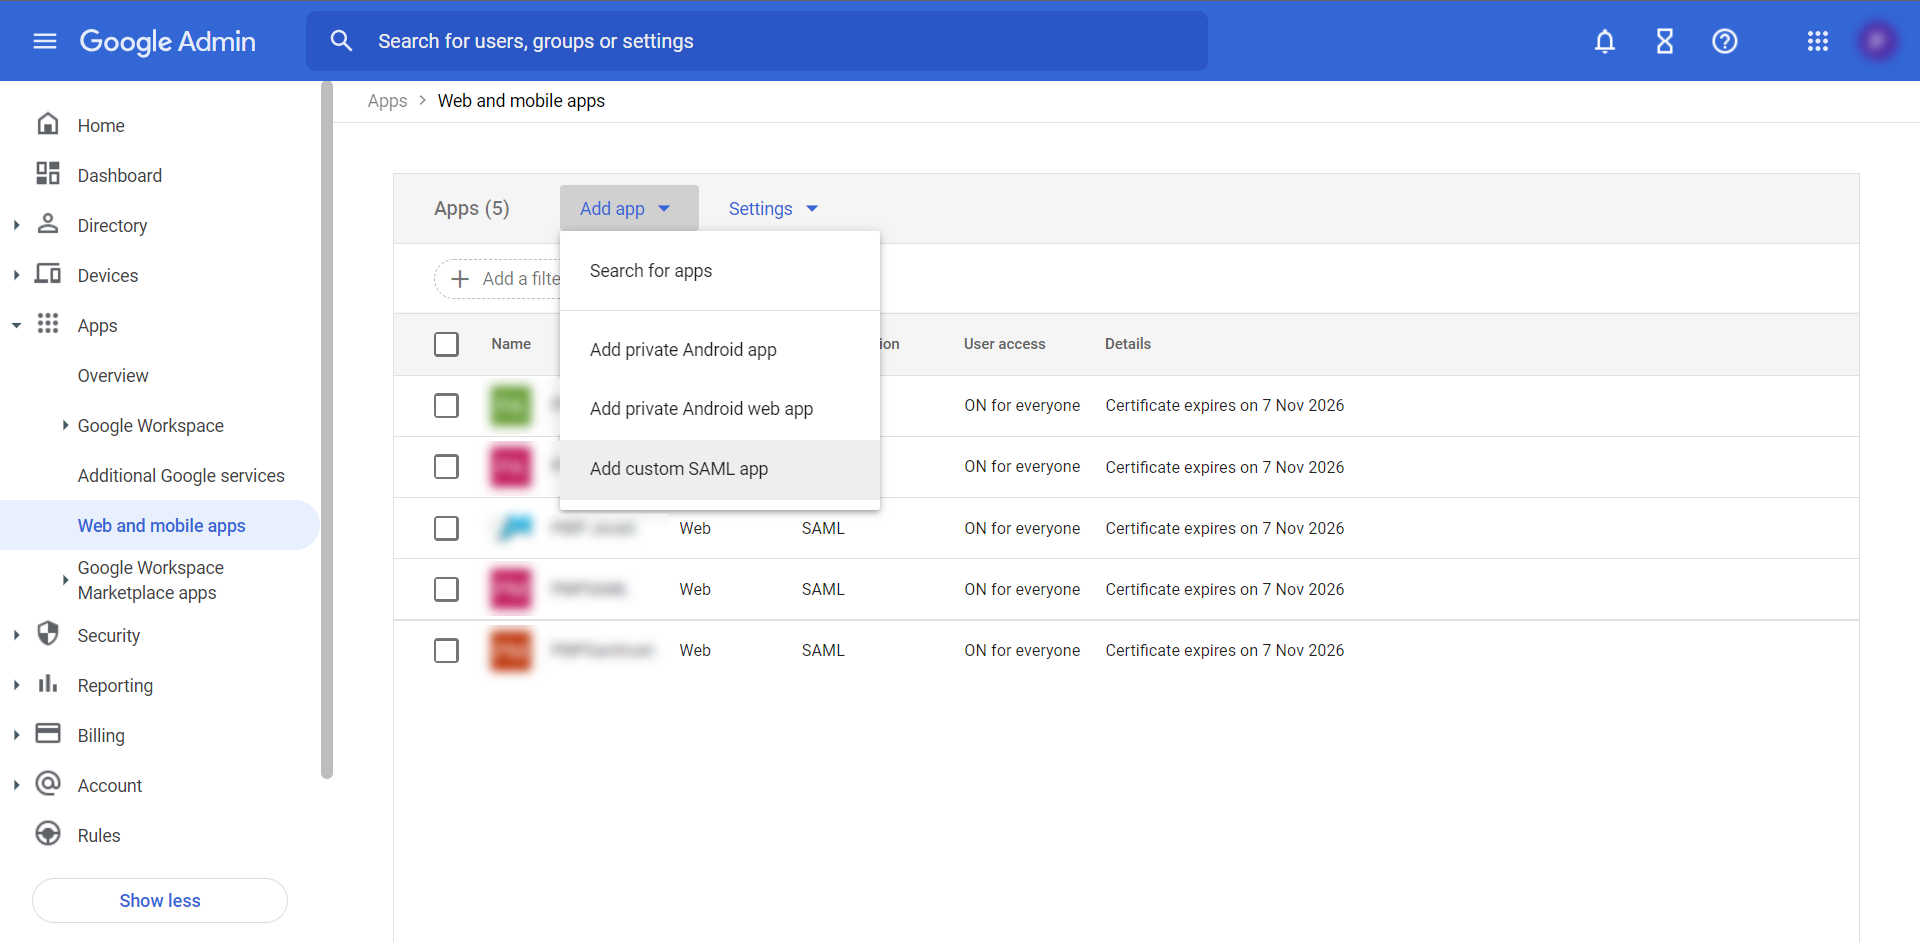
- Log in to G Suite/Google Workspace using Super Administrator privileges and navigate to Apps >> Web and mobile apps.
- Click Add app >> Add custom SAML app.
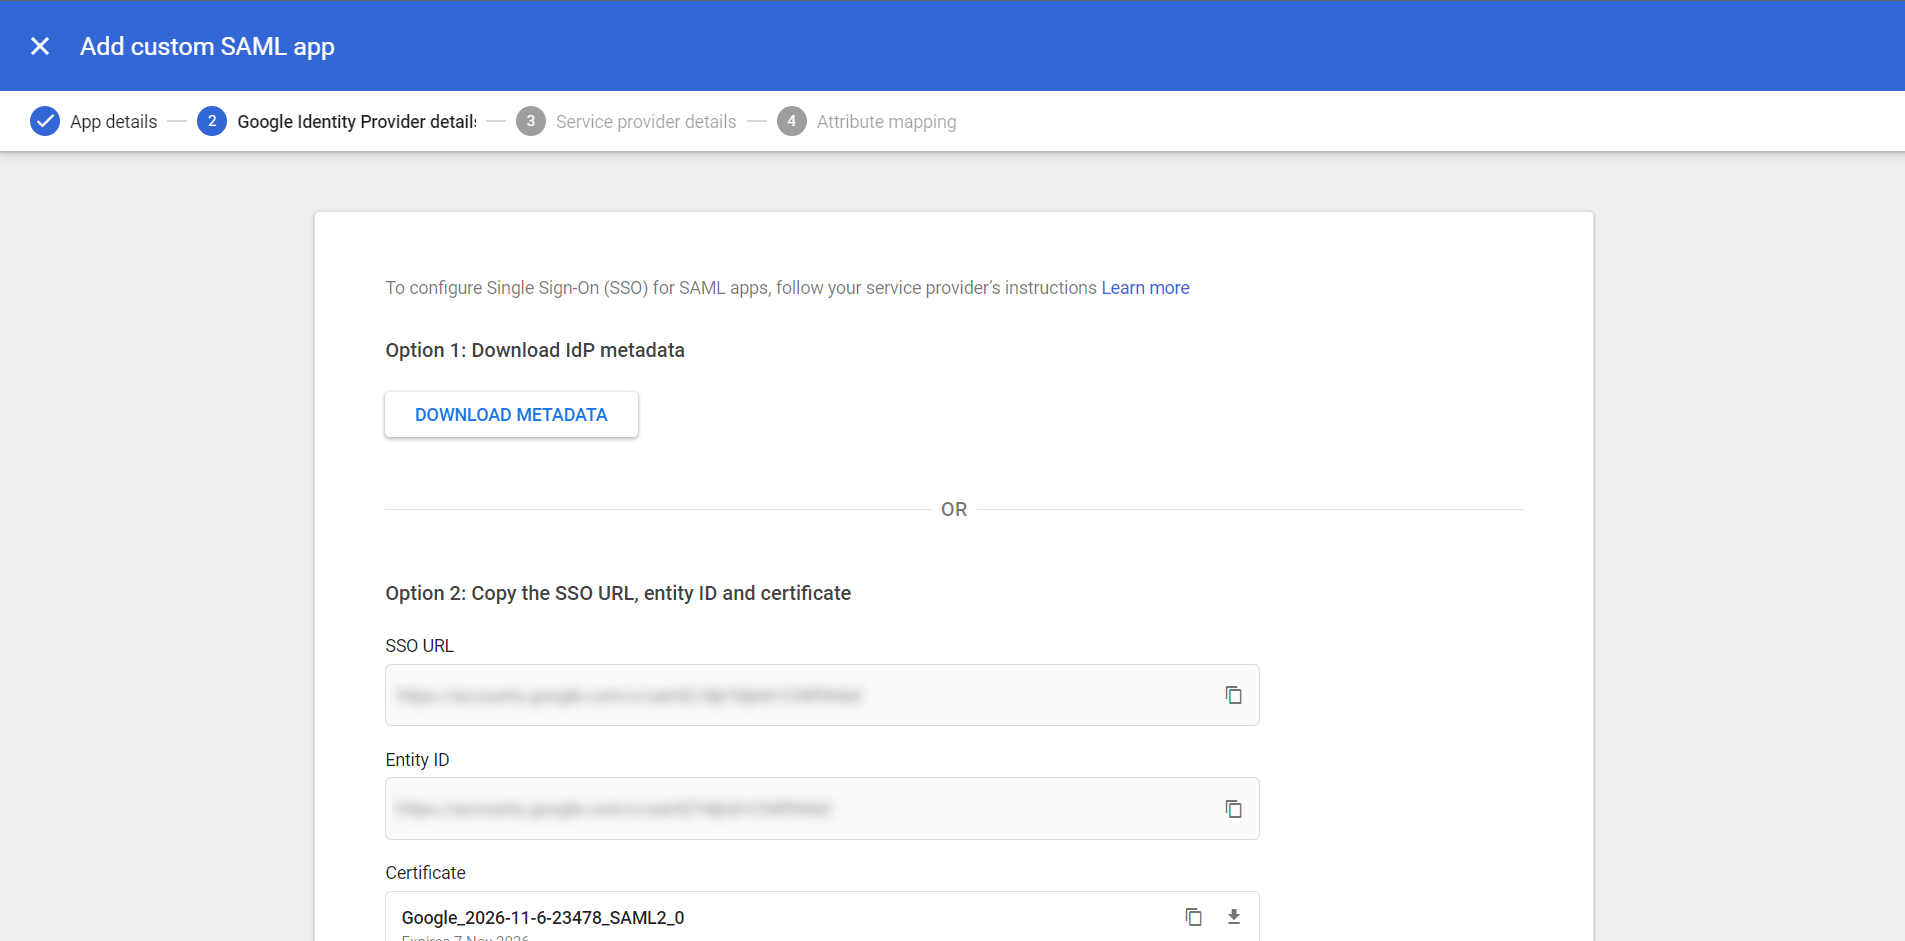
- In the Add custom SAML app page,
- Enter the App name, Description and choose an App icon.
- Click continue.

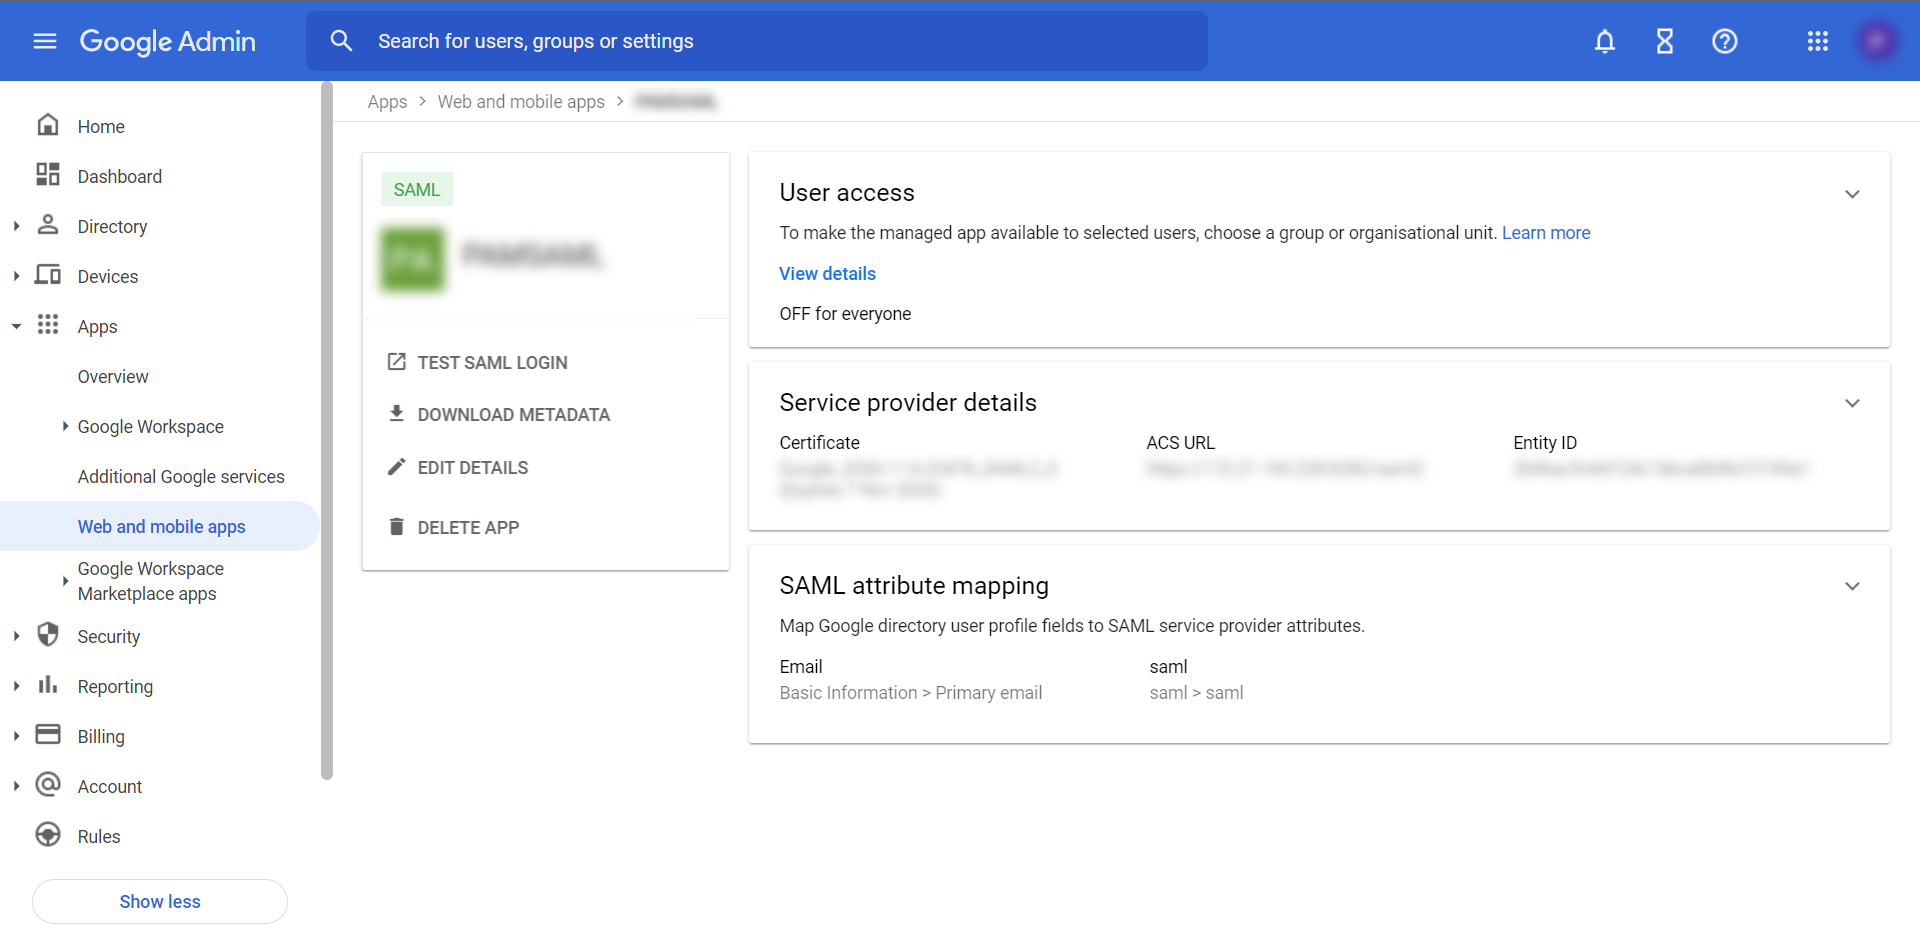
- Here, Download the Metadata file from G Suite and upload in PAM360.
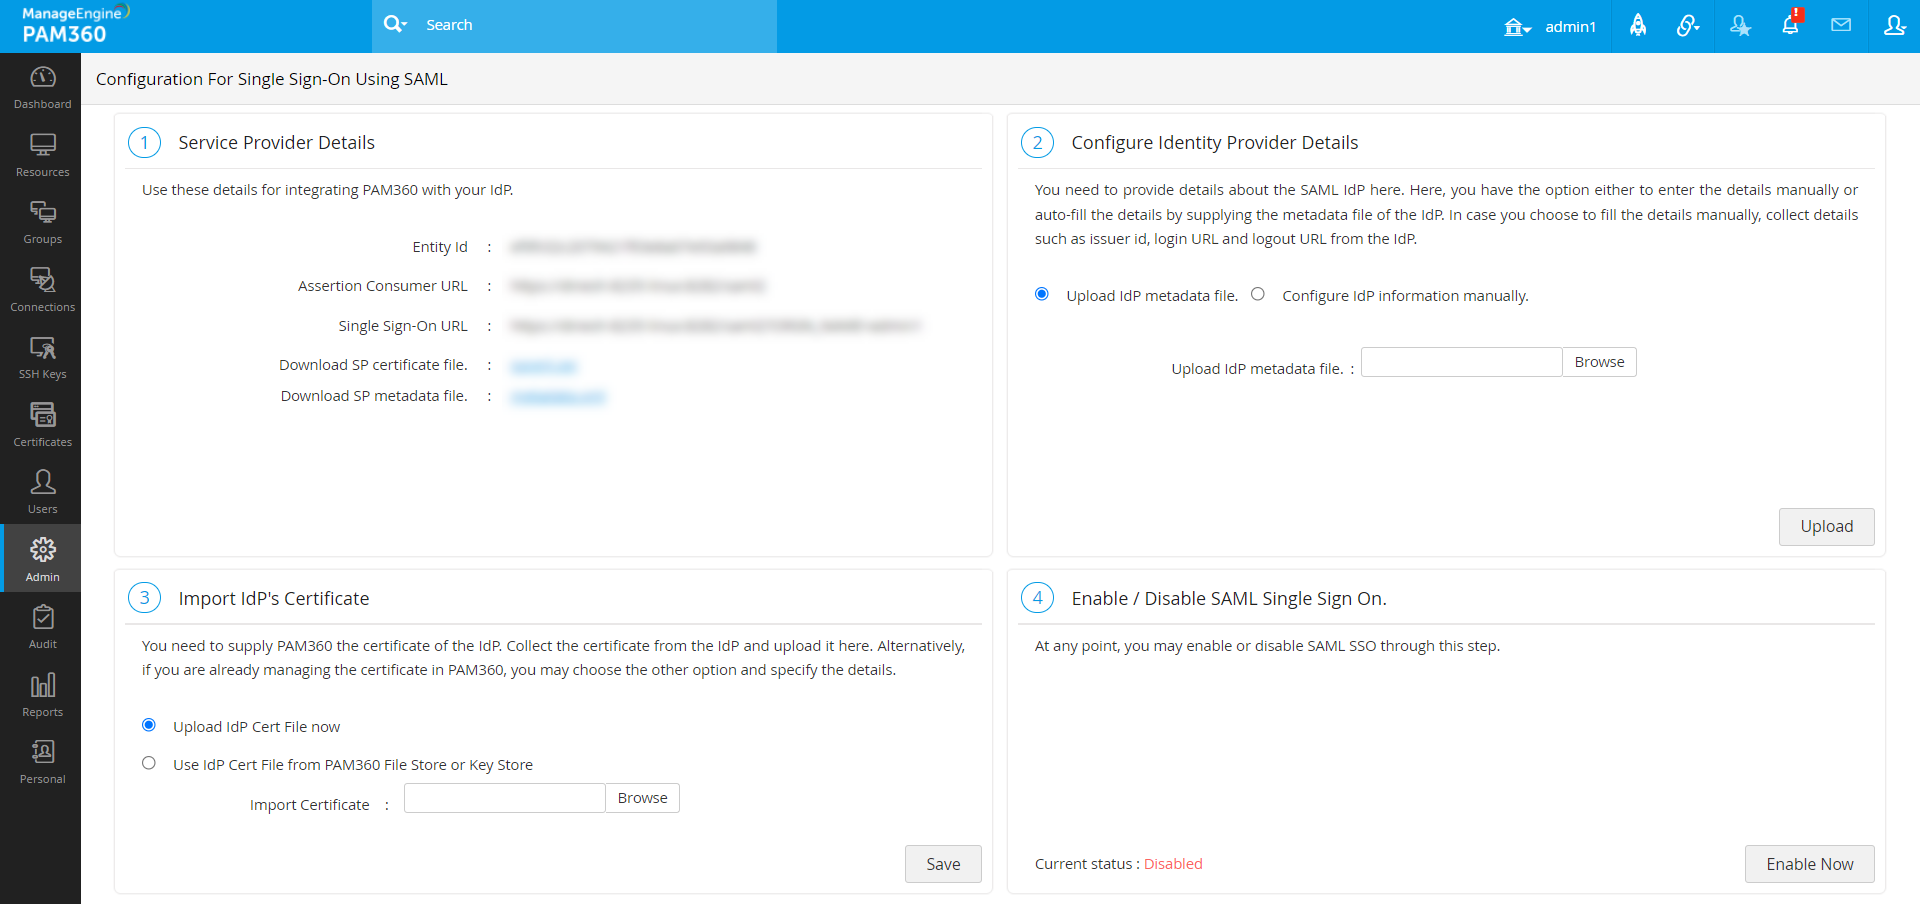
- Log in to PAM360 as an administrator and navigate to Admin >> Authentication >> SAML Single Sign-On.
- Under Configure Identity Provider Details, Browse and Upload IdP metadata file. [OR]
- To update the values manually, open PAM360 and navigate to Admin >> Authentication >> SAML Single Sign On.
- Under Configure Identity Provider Details, mention the SSO URL from G Suite as IdP Login URL in PAM360 and Entity ID from GSuite as Issuer in PAM360.
- Click continue.
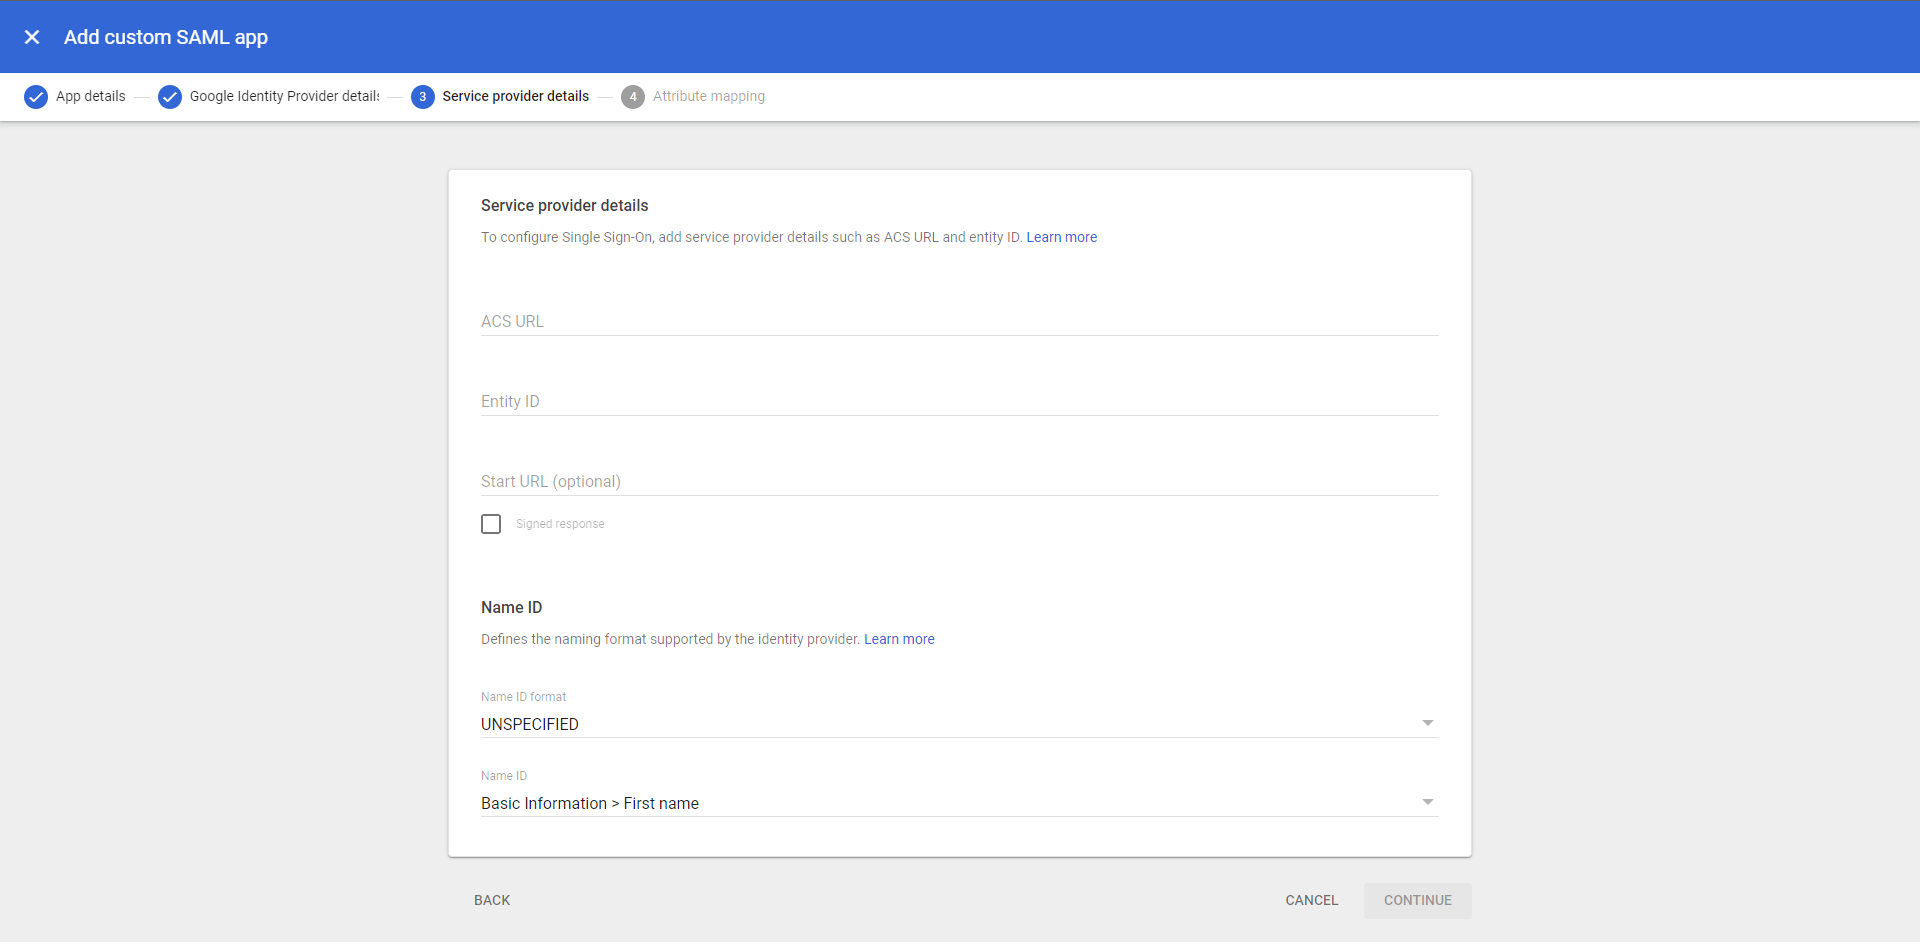
- Now, to configure SAML, mention the service provider details.
- To access these details, go to PAM360 homepage and select Admin >> Authentication >> SAML Single Sign On.
- Under 1. Service Provider Details, you will find Entity Id, Assertion Consumer URL; copy the values.
Note: By default, the Assertion Consumer URL is the hostname of the server. To update this, follow the below steps:
- Go to Admin >> Settings >> Mail Server Settings.
- Under Access URL, update the required URL and click Save.
- Now, the Assertion Consumer URL under Service Provider Details will be updated.
- Go back to Add custom SAML app page.
- Enter Assertion Consumer URL from PAM360 under ACS URL and Entity ID from PAM360 under Entity ID.
- You can also mention the Name ID Format and Name ID here.
Note: We can update FQDN/IP/SAN name of the PAM360 UI here and not the hostname.
- Click Continue.
- You can update the Google directory attributes with PAM360 App attributes now or you could choose to update them later.
- Click Finish. Now, you have successfully set up your custom SAML application in G Suite.
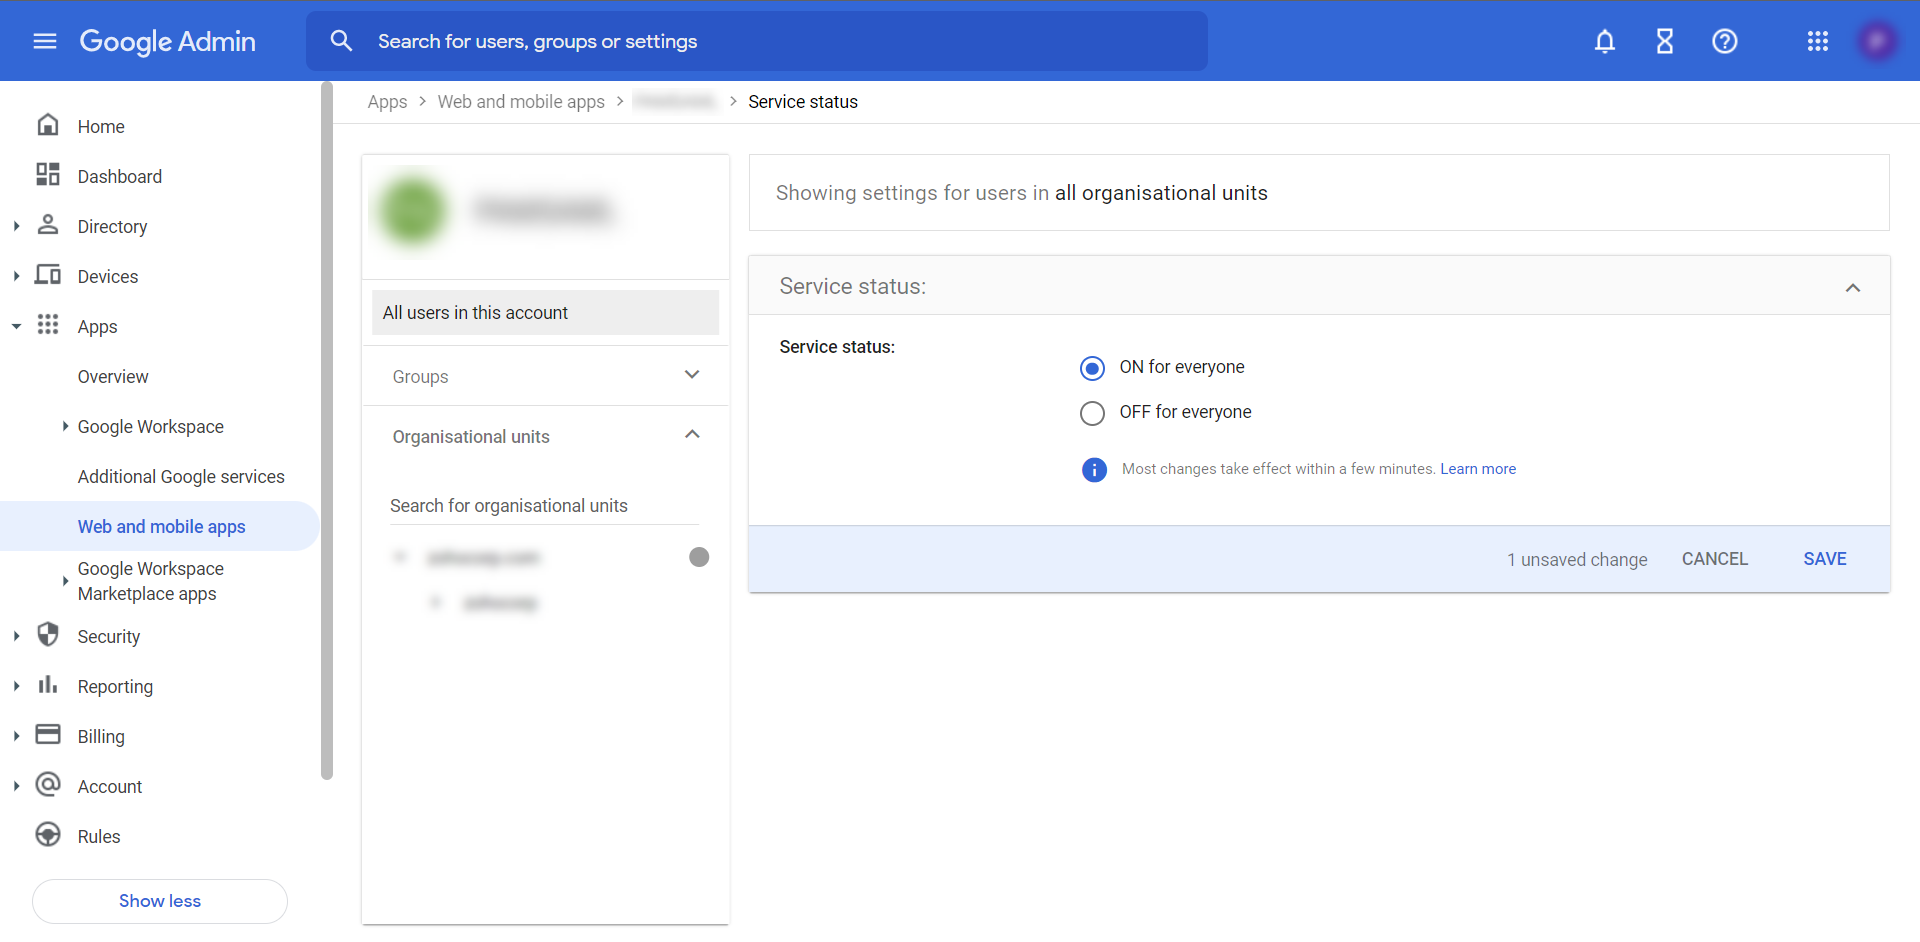
- The User access is turned OFF for Everyone by default. To turn it on, click User access, select ON for Everyone and click SAVE.
- The final step is to enable SAML SSO in PAM360.
- Navigate to Admin >> Authentication >> SAML Single Sign On.
- Under Enable / Disable SAML Single Sign On, click Enable SAML SSO.
You have now successfully enabled SAML SSO using G Suite in PAM360.