Managing SSH/SSL Schedules
A schedule is a time-management tool that consists of list of activities that are intended to take place at a certain time or as a sequence of event. You can create scheduled tasks to automatically carry out operations such as SSH resources and SSL certificates discovery, key rotation, and report generation at periodic intervals.
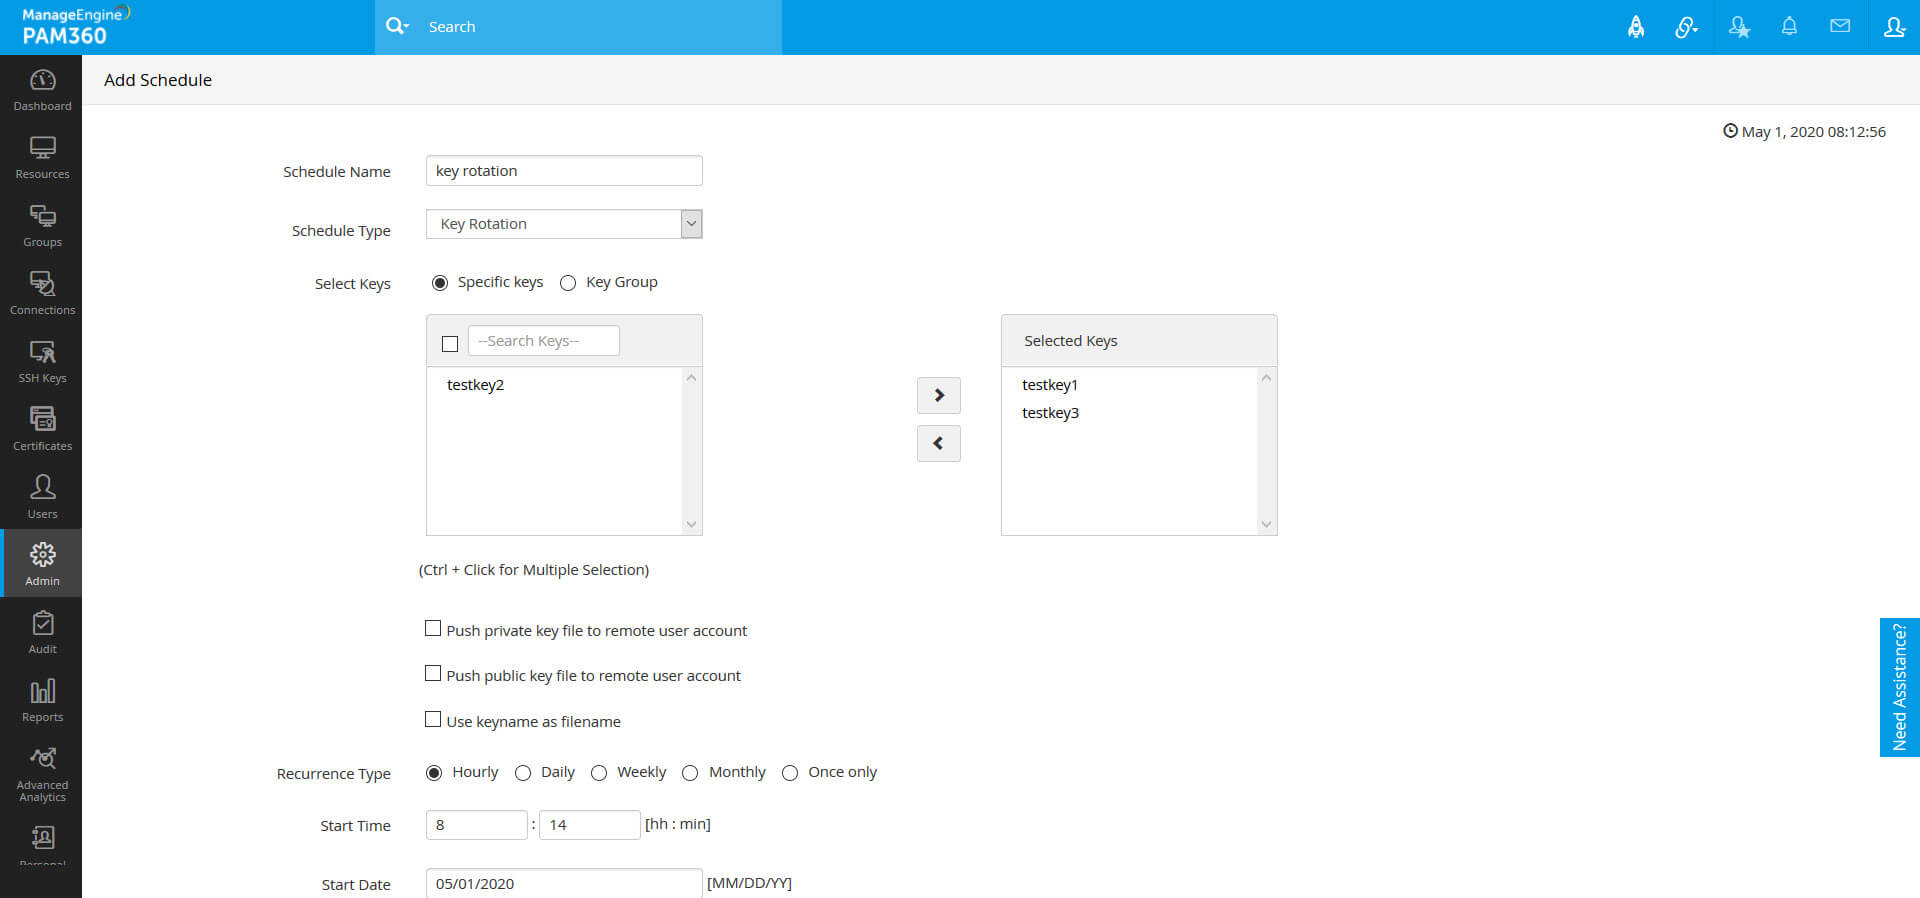
1. Add Schedules
- Navigate to the Admin >> SSH/SSL Config >> Schedule.
- Click the Add Schedule button.
- In the Type drop-down, select the type of schedule. The following are the types of schedules available:
i. Key Rotation
Schedule the rotation of SSH keys assigned to user accounts.
- Select the keys that are to be scheduled for rotation. If keys are not assigned but are scheduled to rotate, schedule rotation will fail and an error message will be displayed in the Audit tab in the GUI.
- Automatically push the key files (private key, public key or both the private and public keys) onto its associated users by enabling the 'Push private key file to remote user account' and/or 'Push public key file to remote user account' option, instead of pushing the key files manually after every scheduled rotation.
- Here, you can also select to Use keyname as filename.
ii. SSL Discovery
Schedule the discovery of SSL certificates using this option. Specify the start and end IP addresses and the ports to be checked for deployed SSL certificates.
- Select Discover by IP Address Range to specify the StartIP and End IP addresses.
- Select Subnet to mention the IP Address and the ports to be checked for deployed SSL certificates. You can also select From file to upload a schedule.
- Select the Bypass Proxy Settings checkbox to bypass proxy server settings during the discovery operation. This option is applicable for the IP Address Range, Subnet and From File modes only.
- If you select Load Balancer, enter the Server Name, Port, User Name, Credential Type, Password and Path. Choose the required load balancer from the Type drop-down: General, BIG-IP F5, or Citrix. To perform Citrix discovery using the Citrix REST API commands, select the checkbox Use REST API (By default PAM360 uses CLI commands for discovery and fetching certificates).
- Choose the Shared Path - Windows option to schedule a discovery operation for a specific directory path.
- Select the Agent checkbox to schedule an SSL discovery through the PAM360 agent. You can perform two modes of discovery through the agent: IP Address Range and Shared Path - Windows.
iii. AD User Certificate Discovery
Schedule the discovery of SSL certificates from active directory—the certificates belonging to various users in Active Directory could be fetched into PAM360 using this option.
- Select the Domain Name or click New Domain to add a New Domain Name.
- Mention the Primary and Secondary Domain Controller.
- Select the Connection Mode (No SSL / SSL) and enter the user credentials.
- Click Fetch Groups & OUs and select the required user accounts / OUs in which certificate discovery has to be performed.
iv. MS Certificate Store Discovery
Schedule the discovery of SSL certificates from Microsoft Certificate Store and certificates issued by Microsoft Certificate Authority using this option.
- Enable Agent to select the required agent from the list of available agents and mention the Time out in seconds or specify the Server Credentials.
- Enter the user credentials or select the checkbox to Use PAM360 service account credentials for authentication.
- For certificates issued by Microsoft Certificate Authority, you can fine tune your discovery based on certificate issue date, certificate revocation / expiration statuses, and certificate templates.
v. AWS Discovery
- Choose the appropriate AWS Credentials from the drop-down. To add new credentials, navigate to the Certificates >> AWS >> Manage.
- Choose the required AWS Service from which certificates need to be imported: ACM or IAM.
- To import certificates from ACM, select ACM under AWS service and choose the service Region. To import certificates from IAM, specify the required AWS User Name(s) or use the List AWSUserNames option to retrieve the usernames. Choose the required usernames.
vi. SSL Vulnerability
Schedule periodic vulnerability scan on selected or all SSL certificates in PAM360 repository. Select the certificates on which the vulnerability scan is to be performed at regular intervals of time, and specify an e-mail id to which notification is to be sent after every scan.
vii. SSL Expiry
Schedule expiry alert notifications for SSL certificates.
- Select the Specific Certificates or Certificate Groups that are to be tracked for expiry.
- Schedule the scan at required intervals of time and specify the number of days to expiry before which the email notification should be sent.
- Select the following options to tailor the scan results that are sent in email. The following preferences are saved only for email and will not change how scheduled scan results appear in the Audit:
- Choose to receive notifications either On Every Scedule or Customize your notifications.
- If you choose to Customize, set the Interval (in days) to notify about the to-be-expired certificates.
- Enable the Email certificates on every schedule if expiry is less than option if you want to receive notifications on all schedules irrespective of the above-set interval.
- Include auto-renewal certificates in email notification - Certificates that will be auto renewed will be included in the email notifications.
- Exclude expired certificates from email notifications - Certificates that are already expired in the repository will be excluded from the email notifications.
- Send a separate email per certificate - Every expired certificate will be sent as a separate email.
viii. Reports
Schedule the reports to be generated and sent to the email address specified. All the reports generated by PAM360 can be scheduled to be sent to email addresses using this option. You can Select Specific Certificates or Certificate groups and move the required certificates to the Selected Certificates column using the arrow keys to generate reports for selected certificates under SSL Certificate Report type.
Scheduling Options
- Select the recurrence type as - hourly, daily, weekly, monthly, or once only. Set the starting time, date, or day, corresponding to the option chosen.
- Enter the email addresses of the users to be notified. The server authentication settings can be specified in the Settings >> Mail Server Settings tab in the GUI.
- Customize the notification emails by adding an email subject of your choice. To tailor the body of the email further, add custom email content, and a unique signature.
Click Save. Now, you have successfully added a new schedule.
To execute a schedule, go to the Schedule window and click the execute schedule icon beside the respective schedule name.
Note: The result of the schedule execution will get updated in the Schedule audit and also in the respective operation audits.
2. Edit Schedules
- Navigate to Admin >> SSH/SSL >> Schedule.
- Click the name of the schedule you would like to edit.
- You will be redirected to the Edit Schedule window. You can edit all the details of the schedule except its name and type.
- Click the Update button to save any modifications.
3. Enable/Disable Schedules
The schedules can be enabled or disabled anytime. Use the disable option to stop the execution of a schedule temporarily without deleting it. When re-enabled, the schedule again starts its periodic execution.
- Navigate to Admin >> SSH/SSL >> Schedule.
- Select the schedules and click the Enable Schedule or Disable Schedule button. You will get a confirmation that the schedule has been enabled or disabled successfully.
Note: The schedules set to run only once cannot be enabled if they have already been executed. Modify the schedule to enable it.
4. Delete Schedules
- Navigate to Admin >> SSH/SSL >> Schedule.
- Select the schedules to be deleted.
- Click the Delete Schedule button.
- Click Ok in the confirmation pop-up window.
You will get confirmation that the schedules have been deleted successfully.